
Image upload with Cloudinary - Part 1 (Next/React & Node JS)
Learn how to send an API request including image data for the upload

Welcome in the three part "how to upload an image" guide! This is a first part of this guide. We will start with some useful links.
Video guide: https://youtu.be/316ybVIiRJM
Lesson code: https://github.com/Jerga99/next-youtube-course/commit/3ce18ff1383f165e4be7b080f20a175328a0cdc8
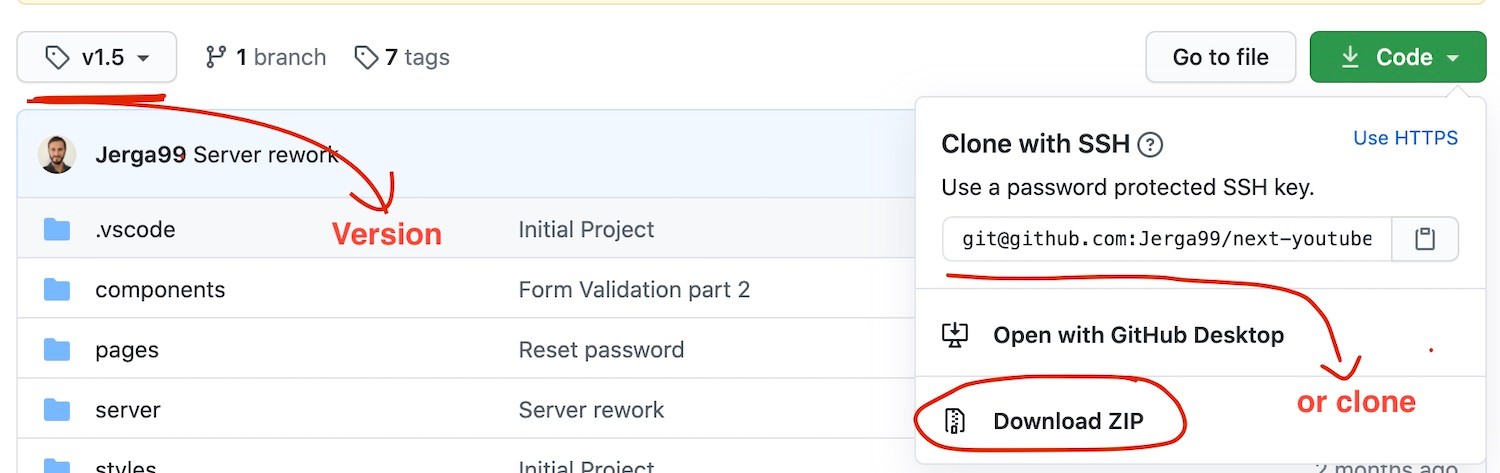
Before starting programming please checkout to v1.5 or download v1.5 of the project. Here is the starter project: https://github.com/Jerga99/next-youtube-course/tree/v1.5
How to setup starting project is also explained in the blog post: https://..... There is also a video lecture included.
Ok, let's starts. First we are going to create endpoint on the server to handle image upload request.
app.post('/api/image-upload', (req, res) => {
  try {
    if (!req.file) { throw new Error('Image is not presented!'); }

    return res.json({message: 'Huraaaay'});
  } catch(e) {
    return res.status(422).send({message: e.message})
  }
})index
Amazing! Now you can send a POST request to localhost:3001/api/image-upload and you request will be served with an error... But that's fine! We are not attaching any image yet.
Now let's move to frontend part.
Let's create new page/component which will render the input to accept an image.
Prepare for lot's of code.
import { useState } from 'react';
import { useMutate } from 'restful-react';
import { PageTitle } from 'components/shared';

const Upload = () => {
  const [selectedImage, setSelectedImage] = useState();
  const { mutate: uploadImage } = useMutate({
    verb: 'POST',
    path: 'image-upload'
  });

  const handleChange = event => {
    setSelectedImage(event.target.files[0]);
  }

  const handleImageUpload = () => {
    if (!selectedImage) { return; }
    const formData = new FormData();
    formData.append('image', selectedImage);

    uploadImage(formData)
      .then(uploadedImage => {
        console.log(uploadedImage);
      })
      .catch(_ => {
        console.log('Oooops, something went wrong!')
      })
  }

  return (
    <>
      <PageTitle text="Upload Image"/>
      <input
        onChange={handleChange}
        accept=".jpg, .png, .jpeg"
        className="fileInput mb-2"
        type="file">
      </input>
      <div>
        <button
         onClick={handleImageUpload}
         disabled={!selectedImage}
         className="btn btn-primary mb-2">
          Upload
        </button>
      </div>
    </>
  )
}

export default Upload;upload
Most important part here is to handle change event of the input. Whenever user will select new file handleChange function will be executed.
You can retrieve the image from the event it self. You need to access it under event.target.files[0]. After the image is selected we will simply store it to the state.
Now we need to send selected image via POST request to previously created endpoint. We will register useMutate POST function provided from restful-react package.
Upon clicking on the upload button handleImageUpload function will be executed. In the function we will check if an image was selected. If the image was selected we will create formData variable where we will assign instance of FormData type. We are creating formData because later we will integrate Multer middleware and Multer will expect to receive formData. Usually you are sending JSON type in the request FormData is just different data type. Next we need to append selected image to formData under the "image" key.
Now all data are ready. We just need to execute uploadImage function which will send a POST request to 'api/image-upload'. Request will still fail, but that's fine we are still not handling it.
That's should be it from first part of image upload tutorial. In next part you will learn how to upload image to Cloudinary.
For more courses and blogs please check: https://academy.eincode.com.
Part 2: https://www.eincode.com/blogs/image-upload-with-cloudinary-part-2
Cheers!
Filip
Filip Jerga
Senior developer and educator passionate about making programming accessible to everyone through practical, hands-on learning experiences. Creator of 100+ courses with over 100,000 students worldwide.
Enjoyed this article?
Subscribe to our newsletter to get the latest programming tutorials and insights delivered directly to your inbox